Historians assert that the 7th century BC saw the introduction of metal stamping on coins. An intricate die was made, and the metal was carved with a powerful hammer. It took 12 persons working together to complete the task of screwing the die in the metal coin until the procedure was perfected in 1550. It is now possible to do it independently from the convenience of your home. A handmade item that is created with love is always the best. With the help of metal stamping, you can easily make inexpensively priced personalized presents for all occasions and holidays.
How to Begin
Metal stamps are simple to use once you get started. The process consists of four steps, which are listed below.
Step 1
Set up a strong workplace to start; after all, you will be using a hammer. Put a sturdy piece of wood on top of your workspace if you are concerned about scratching the surface. To ensure that the energy of your hammering is distributed equally while stamping on a tabletop, be sure to stamp on the robust leg of the table.
Step 2
Gather your tools and position your stamping block in close proximity to you. This will serve as your practice piece. We advise you to start with either the practice aluminum foil or any sheet metal that is suitable for metal stamping. Using these metal pieces and foil will allow you to practice how deeply your custom metal stamps will imprint the metal, which will help you get more acquainted with how hard you ought to hit. Practice is crucial, in our opinion, to ensure that your final product is flawless.
Step 3
Select the stamp you wish to use as your starting point (check that it is not inverted!) and hold it steady with your forefinger and thumb. Start by striking the stamp’s top with the hammer you just picked up. It could take a few attempts to determine the ideal place to strike the stamp. You might need to use the tilt and tap technique to imprint the stamp’s whole surface if it is bigger or more intricate.
Step 4
Select the metal stamping template you want to utilize for your creation when you feel ready to do so. To prevent the blank from shifting and requiring two stamps, fix it to the block with your stamping tape. Similar steps to those you took with your practice aluminum foil or sheet metal should be used here. Do not fret if your item is not flawless; metal stamping requires practice, just like any other creative form, and everybody who does metal stamping frequently has a stock of inadequate blanks they utilize for future practice. As you practice, you will understand where and how to press the stamp in addition to whether you ought to press it only once or twice.
Starting Your Adventure in the Realm of Metal Stamping
Start out small and straightforward. Make sure you have quite enough metal stamping tools because you will need to practice a lot before moving on to more challenging projects. To improve your skill, it can be beneficial to buy larger tags or specific practice blanks when buying blanks. Start off by staying on level surfaces. They are simple to mark and stamp with your desired design.
Technique Is Important
You want your final product to be flawless. Do not be disheartened if your initial few projects are not satisfactory; it will take some practice to perfect your technique. You will arrive there earlier than you anticipate!
Impact Power
Your method must include using the proper amount of force when stamping the blank. You most likely will not be capable of trying again with the same piece if, after your initial attempt, you raise the stamp and discover you have hardly created a mark. It wo not always be simple to align your stamp with your original imprint. The majority of metals used during metal stamping require a severe blow before stamping can take place. However, various metals require stamping with varying degrees of force. For instance, aluminum typically does not sustain damage to the same extent as brass. You wil gradually develop a sense of how hard to strike each alloy as you practice.
Accurate Positioning
Unbelievable as it may seem, choosing a pattern that does not suit the blank is a regular error made by novice makers. Before stamping, it can be useful to outline the precise placement with a pencil as well as masking tape. Marking out the center and then planning as you stretch outward is one method you may use to increase the precision of your placement.
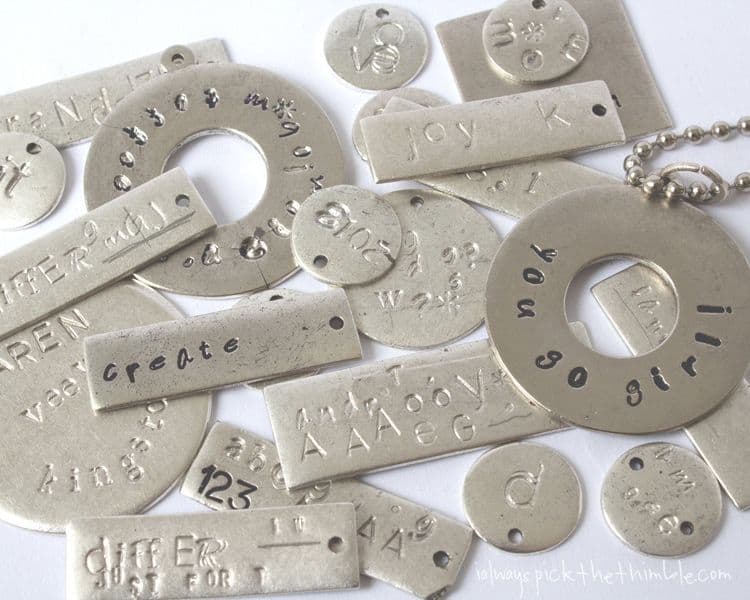
Developing Projects
Okay, now that you have had enough practice, it is time to tackle some real projects. Start formulating ideas for how you want your final product to appear. Additionally, you can start organizing bespoke presents like pet tags, name pendants, special date tags, and jeweler charms.
Style Enhancement
For a while, simple stamping might be sufficient, but most crafters eventually wish to add enhancements to their creations. The good news is that you can accomplish that in a number of ways.
Make Your Letters Pop!
Other metal stamping projects may have drawn your attention with their bolder, darker letters. This effect is simple to produce on your own by carefully filling in the impressions left by the stamping with a black Sharpie. Even though Sharpie is the simplest approach to make your writing stand out, it can wear off over time. You can imprint blank enamel and make something more durable that way. When it comes to jeweler and other items that get a lot of wear, the enamel will appear a lot more polished and maybe a better option.
Digging Holes
Not all jewelry-making stamps include pre-punched holes, but some do. You can either use hole-punching pliers or purchase specialist hole-punching tools and stamp the hole yourself.
Changing the Textures
You can change the texture of your finished product using specialized hammers if you think it is a tad boring. They can leave zigzags, dimples, lines, and more behind.
Dapping
You will need a dapping block in order to give a straightforward blank a curved appearance. They have different-sized circular daps that you can use with bent hammers to create an indented or mounded look. Do not be concerned that you will destroy your design. Dapping has no impact on the look of your stamp.
The Only Thing Stopping You is Your Imagination!
It takes some practice to master metal stamping, but if you follow the instructions in this manual, you will be a pro in no time.


