Making leather name badges and other items using leather stamping may be entertaining. Even though it might seem difficult, using metal stamps for stamping leather is actually quite simple if you have the correct tools. To make personalize leather items, all you need is a hammer and a set of leather stamps.
Why Do People Stamp Leather?
- This manual will be an excellent place to start if you have been pondering over how to stamp leather using custom metal stamps. But before addressing the HOW, we must first address the WHY, which is a more fundamental query. So why stamp leather? If you have never stamp leather before, you might be perplex as to why anyone would ever want to do so. People stamp leather for a variety of purposes. The first is relate to its craft. Leather stamping is another type of creative activity, similar to knitting, crocheting, or sewing.
- The appearance of leather is another factor that inspires people to stamp it. Decorative designs are frequently imprint on a variety of leather goods, including belts, wallets, and purses. Apart from the aesthetic value it gives the product, its design serves no other use. As an illustration, many western goods, such as leather cowboy belts and other accessories, are imprint to lend them a unique western appearance.
- Lastly, functionality is also one of the reasons for stamping leather. To serve as walking billboards for their products, several companies, for instance, may stamp leather goods so that people can identify the brand of the item the individual is wearing. Moreover, leather can be stamp to create a variety of additional items, including luggage tags and name badges.
Prepping the Leather
Buy Quality Leather
The correct kind of leather must be purchase before you can start stamping it. Vegetable-tanned leather is the ideal kind for stamping. You may use a few other varieties of leather as well, but for novices like yourself, it is best to stay with vegetable-tanned leather because it is less difficult to deal with and is not overly expensive. A really pricey sheet of leather is the very last thing you would wish to practice learning a craft like stamping leather on.
Trim the Leather
- Getting your leather into the proper form and size for the object you are manufacturing is the second step in the leather stamping process. If you must cut your leather, be sure that you do so with the flesh part facing up for a precise cut. Naturally, we merely refer to this side as the “meat side” because there will not be any flesh there, so make sure to flip it over before chopping.
- The leather ought to be slightly wet, but not drench.
Getting the Leather Wet
- Next, you need to moisten the leather. This technique could take somewhere from a few minutes to an entire night, depending on the amount of time you have and how passionate you are towards leather stamping. Get a sponge wet, then quickly apply it to the top and flesh side of the leather strip to moisten it in preparation for stamping.
- Although it will do the job, more accomplished leather stampers might not be satisfied. These leather artisans ought to bathe their leather products in a bathtub, a sink from the store, or a sizable basin. To guarantee that the water has permeate every fiber of the leather, immerse the leather in water till no bubbles appear. The leather should then be hung to drain any extra water, and all the air should be suck out of the bag before placing it in a polyethene shopping bag. Until you are prepare to stamp, you can leave it to sit for a few hours or overnight, according to the amount of time you have.
Stamping
Set the Leather Down on a Sturdy Surface
As you will need to apply a lot of pressure in order for the stamps to adhere, stamping leather should always be done on a firm surface. Placing a hardwood piece on a level surface is a smart idea. Stamp the leather onto the hardboard.
Place Your Stamp onto the Leather
- Pick up your leather stamp. Wherever the picture or letter should appear on your leather, place the stamp there. Put one hand on it to secure it. Check to see that the leather is completely flat.
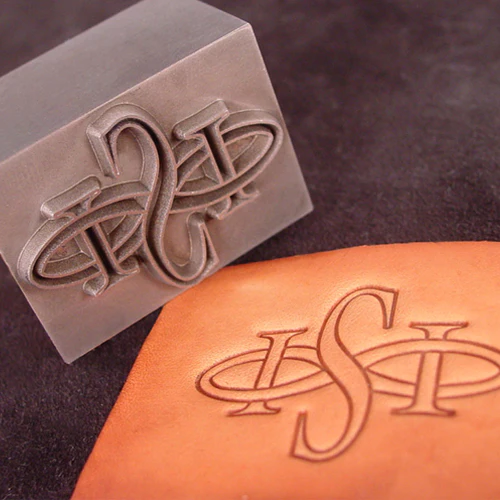
- Stamps made of leather are a must. Online or in some craft stores, you can purchase them.
Press the Stamp onto the Leather with a Hammer
Make a stamping motion with the opposite hand. In the leather, this will firmly embed the picture or letter. The picture or letter will transfer after a few firm blows with the hammer on the stamp.
Continue Until your Design is Finished
When your picture or text has been deposit, continue the process with the subsequent picture or text. To transfer the image, firmly pound the stamp with a hammer a few times after placing it where you would like it on the leather.
Assuring the Quality
Do Some Practice Stamps First
Testing your stamps in advance is always a smart idea. A small test piece of leather should be cut out, moisten, and stamp. Count the number of times you have to smash the stamp to get the picture or text to transfer.
Rewet the Leather as Needed During the Process
Re-wet your leather as necessary if you see that it is drying out. You generally will not need to re-wet your leather if you are only stamping on a single or two pieces of artwork or letters. You will need to pause sometimes and rewet your leather, though, for larger projects.
After Stamping the Leather, Allow it to Fully Dry
Immediately after printing your photographs on the leather, put it aside. Prior to working with the leather in any other way, such as sewing, let it entirely dry out. The amount of time needed for drying depends on the type of leather and how wet it was during the stamping procedure.
Final Thoughts
Theoretically, stamping leather is not difficult, as you can see. However, in practice, it is a little more difficult because there is no way to stamp onto a final piece without maybe damaging it if you lack a knack for creating leather goods yourself, from the ground up.


